If your services include IQComputing’s POP3 or IMAP email accounts, you can use the following steps to add an email account to your iPhone (these steps do not apply to Exchange email accounts).
Step One
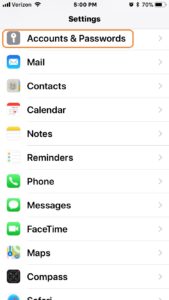
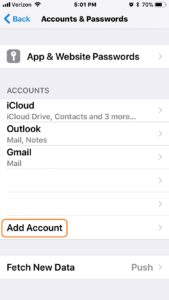
From the Home screen tap the Settings icon, next, tap Accounts & Passwords and then tap Add Account

Step Two
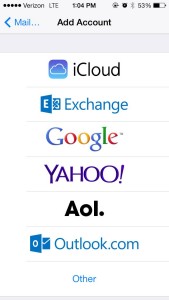
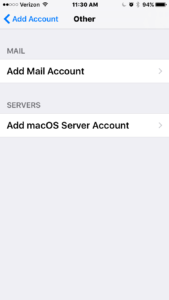
From the Add Account screen tap Other and from the Other screen tap Add Mail Account

Step Three
On the New Account screen enter your Full Name (First and Last). Enter your full E-mail address, Password and Description of the Email Account if you do not like the default domain name for the account.

Step Four
On the next New Account screen select IMAP or POP as your account type and enter the Host Name, User Name and Password under Incoming Mail Server and Outgoing Mail Server settings.
See a full list of email server ports and settings for Google Apps and SmarterMail.
Step Five
Confirm that you have correctly entered all information required and tap Next.


Step Six
Your account configuration will be verified.

Step Seven
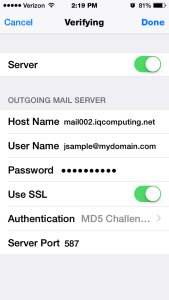
If you chose an IMAP account you may enable Mail and Notes services then tap Save and you will be directed back to Mail, Contacts, Calendars. Enter your Account information screen and tap the Mail Server Host Name in the SMTP field to the right under Outgoing Mail Server and verify that your Outgoing Mail Server Settings are configured properly for your type of account.
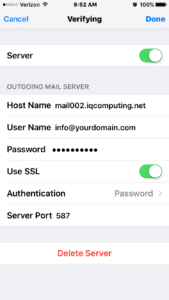
Step Eight
By default, iPhone Mail attempts to connect to your Mail Server using SSL and the correct information and port numbers are entered for you.
Step Nine
If you chose a POP account enter your Account information screen and tap the Mail Server Host Name in the SMTP field to the right under Outgoing Mail Server and verify that your Outgoing Mail Server Settings are configured properly for your type of account.

Step Ten
Upon completing these steps your email account should be ready for use on your phone. Please test your new account settings by sending a message to yourself and if you have an alternative account try sending a message to that account and then reply back from the alternative account to your new mail account to confirm send/receive is working as expected!