Setting up shipping for your WooCommerce ecommerce website.
Sometimes setting up shipping for your ecommerce store can be confusing and overwhelming. Luckily WooCommerce actively improves the way their system works and we’re here to help you correctly set up shipping prices for your products. Below we’ll provide clarification on settings based on the latest WooCommerce version available. The following article applies to WooCommerce version 2.6 and newer.
First, we’ll need to login to our WordPress installation. Using the left-hand navigation, click on “WooCommerce” and from the submenu under WooCommerce click “Settings”. Here we’ll see all our store settings categorized into tabs at the top of the page. We want to click on the “Shipping” tab.
WooCommerce is fairly versatile when it comes to shipping. It is important that you sit down and write out where you will ship to, and what you think you might charge for shipping and handling. You will want to set up shipping zones before you jump into setting up product shipping, making this process much easier and faster.
Shipping Zones
The first step to setting up shipping begins with creating shipping zones. A Shipping Zone is a geographic region in the world that we will set a specific shipping method onto. It can be as broad as “Rest of the World” or as specific as a single zip code such as “63021, Missouri”. How it is set is dependent on the fees involved in shipping to that area of the world, and what you would like to charge to ship there.
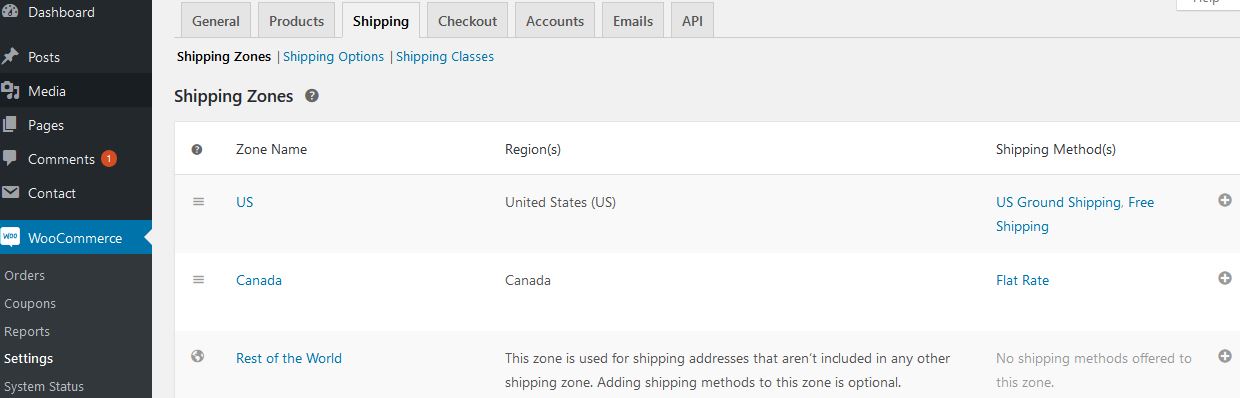
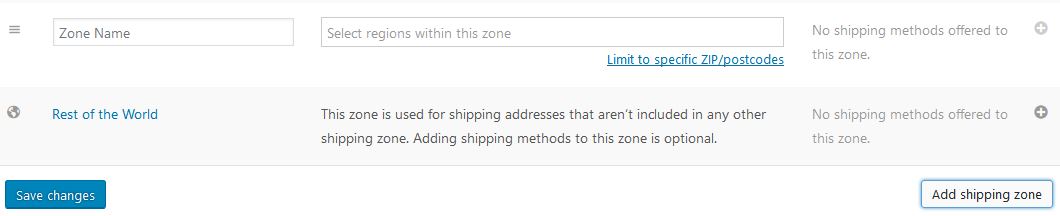
Add a shipping zone: To add a new zone, click the Add shipping zone button. Name the zone something meaningful and relevant then select the regions within the zone (see images below as examples). Zones may be limited by Zip/postcodes. If you choose to allow local pick up then Zip/postcodes is the approach to take. Once you have the zone defined click the save changes button. Once saved, you can go back and edit, browse or remove a zone by hovering your mouse over the zone name.
Here we’ll add in the United States (U.S.) as a shipping zone which will allow us later to define which method we want to ship to the whole United States and what price we want to set it at ( if any ).

Shipping Methods
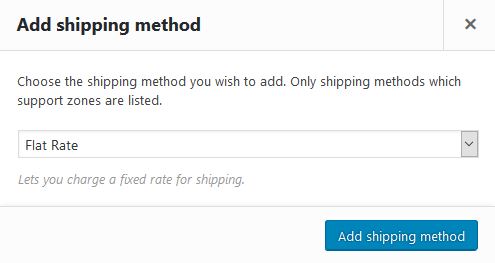 Add shipping methods: Once your shipping zones are created you are ready to add shipping methods to each zone. To add a shipping method click on the plus sign icon in the Shipping Method(s) column, select the method from the drop down and click the Add shipping method button. There are three default shipping methods available (Flat Rate, Free Shipping, and Local Pickup).
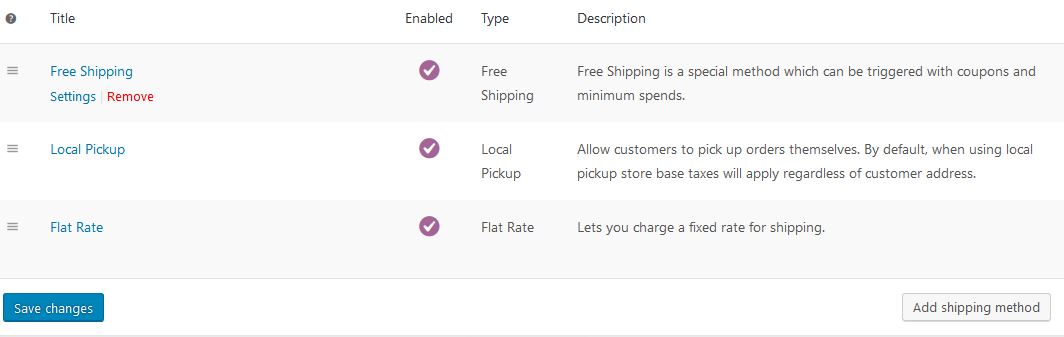
[clear type=”both”]Shipping method settings: Once you have the shipping methods added you can manage zone shipping method settings by clicking on the zone name. You can review/edit shipping method settings or remove the shipping method completely. You can also drag and drop shipping methods here, to set the order in which the customer will see them on your site (hover your mouse over the three-bar icon to the left of a shipping method to drag it and set the order).
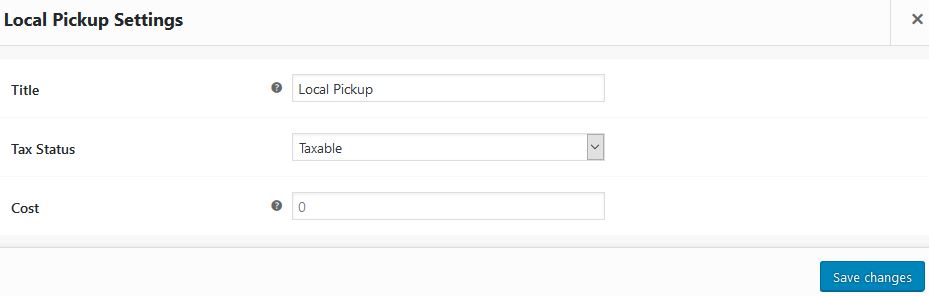
Local pickup: Here we can set the tax status and any cost associated (if local pickup is free you may leave the cost as 0).
Free shipping method: This shipping method, as the name implies, enables free shipping on the customer’s cart.
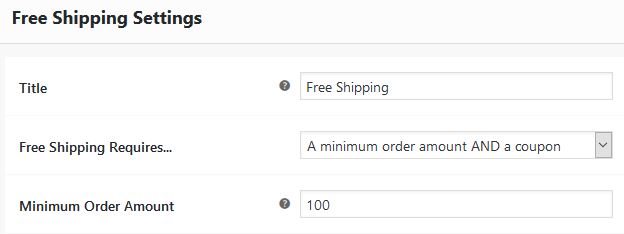
Free shipping settings:
- N/A – free shipping for all carts
- A valid free shipping coupon – you can create a coupon which enables free shipping when entered by the customer. *See WooCommerce>Coupons to create a coupon and WooCommerce>Settings>Checkout tab to enable coupons (Checkout our support article on coupons here!)
- A minimum order amount – you must enter the minimum amount in the Minimum Order Amount field
- A minimum order amount or a coupon – you must enter the minimum amount in the Minimum Order Amount field and should have a coupon setup
- A minimum order amount and a coupon – you must enter the minimum amount in the Minimum Order Amount field and must have a coupon setup
Flat rate shipping method settings:
To better understand how to setup and configure these settings let’s look at an example of shipping method settings for flat rate shipping.

As you can see from the image above you have several settings available (we will discuss shipping classes shortly).
Method Title: Use the default title or rename the payment method to something relevant which the user will see
Tax status: Set the shipping method as taxable or not
Cost: Cost for the entire cart order goes here and you can add additional cost here based on the products in the cart
Cost options:
[qty] – number of items
[cost] – the total cost of items
[fee] – percentage based fee
Additional Cost Examples: (assume costs in default currency – USD)
5.99+(.99*[qty]) – Here the shipping will cost 5.99 plus .99 for each item in the cart
5.99+[fee percent=”10” min_fee=”.09” max_fee=”100”] – Here shipping will cost 5.99 plus 10 percent of the order, but not less than .09 and not more than 100
Let’s continue with shipping classes: As you can see in the previous image there are several shipping class fields available in the flat rate settings.
Shipping Class Cost: a separate field for each class, where cost may be set for an individual class
No Shipping Class Cost: this applies when using the Per Class calculation type
Calculation Type: There are two options – Per Class: charge shipping for each class individually
Per Order: the most expensive shipping class in the cart will be charged
Referring back to the flat rate settings image you can see that the flat rate cost per order is set to zero and shipping class costs are defined individually. With the class costs as shown a customer cart that contains two hoodies and one poster would charge a flat rate of (5.95*2) + (1.49*1) = 13.39. Setting the calculation type to per class enables these individual charges. Should per order be selected as the calculation type the total shipping charge would be a flat rate of 5.95*2 = 11.90 – which is the most expensive item shipping rate times the count of that item in the customer cart. Additionally, in this example, any product not assigned a shipping class will ship with a cost of 0. Therefore two hoodies, one poster and 5 widgets would charge a flat rate of (5.95*2) + (1.49*1) + 0 = 13.39.
Shipping Classes
Shipping classes: Earlier we discussed shipping classes (which allow us to set shipping costs on specific product classes) so let’s dig a little deeper on how to setup classes to sell your varying products. Most likely, unless you only sell digital products, you sell products of differing sizes and or weights, and this is where shipping classes are so valuable. Shipping classes allow you to assign varying shipping rates to specific product categories or even specific products. In our example we have three specific categories configured for hoodies, posters and t-shirts. Each of these products ship in different package sizes and due to weight and packaging require unique shipping costs.
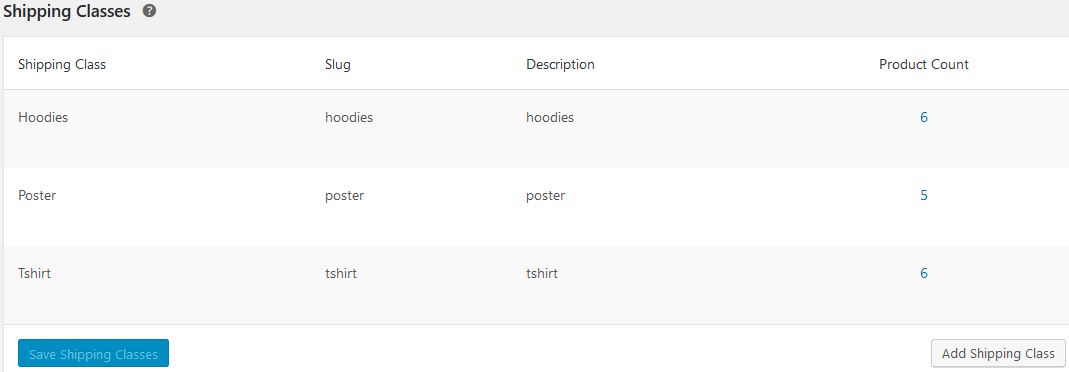
Add a shipping class with the name and description you need. The recommended approach is to leave the slug field alone since it is automatically and uniquely created when you don’t fill it in.
Refer back to the shipping class costs section of the flat rate shipping method settings image to review how to apply unique shipping charges to specific shipping classes. From the example image you can see that for hoodies we are charging 5.95 for each unit in the customer cart (5.95*[qty]), 1.49 for each poster and 2.99 for each tshirt.
Assign/Edit shipping class for a product: Once you have your shipping class created, you need to assign it to your product/s. From your dashboard left nav bar, select Products>(open one of your products)>Product Data>Shipping>Shipping class drop down
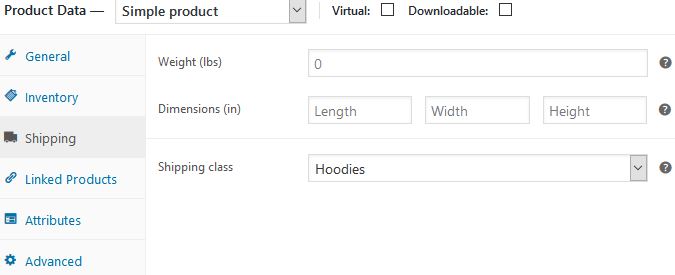
Once you select the appropriate shipping class for the product make sure you click the Update button to save the assignment.
Shipping Options
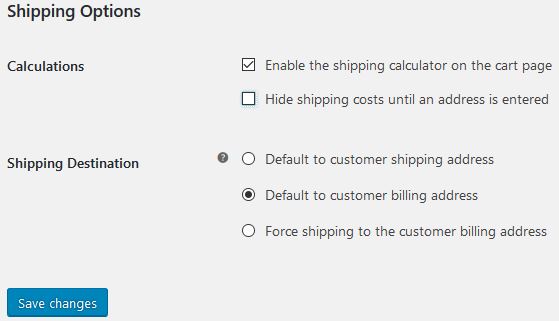
Shipping options: Finally, you can use shipping options to enable the shipping calculator on the cart page, hide shipping costs until address information is provided and set shipping destination defaults. You have shipping setup at this point so go ahead and enable the shipping calculator for customer use!
As you can see WooCommerce (version 2.6 and newer) provides many different shipping options out of the box. If you have any questions or any additional functionality envisioned please contact IQComputing to discuss your options!