For Microsoft Windows 8.1 and 10 operating system users, please follow the directions below to add a Google Apps IMAP E-mail account to Outlook.
Enable IMAP in Gmail Settings
- Sign in to your Gmail account via webmail
- Click the gear icon at the top right of the screen
- Select Settings
- Click Forwarding and POP/IMAP
- Select Enable IMAP
- Click Save Changes
- At the top right of your browser window left click your profile photo/icon and click the My Account button
- On the My Account screen locate Sign-In & Security and click ‘Apps with account access‘
- On the Sign-In & Security screen locate ‘Allow less secure apps:’ and click the toggle to turn ON
Now that you have enabled IMAP in Gmail, and enabled Outlook to access your account, you need to configure your account in Outlook
Outlook Configuration
Step One
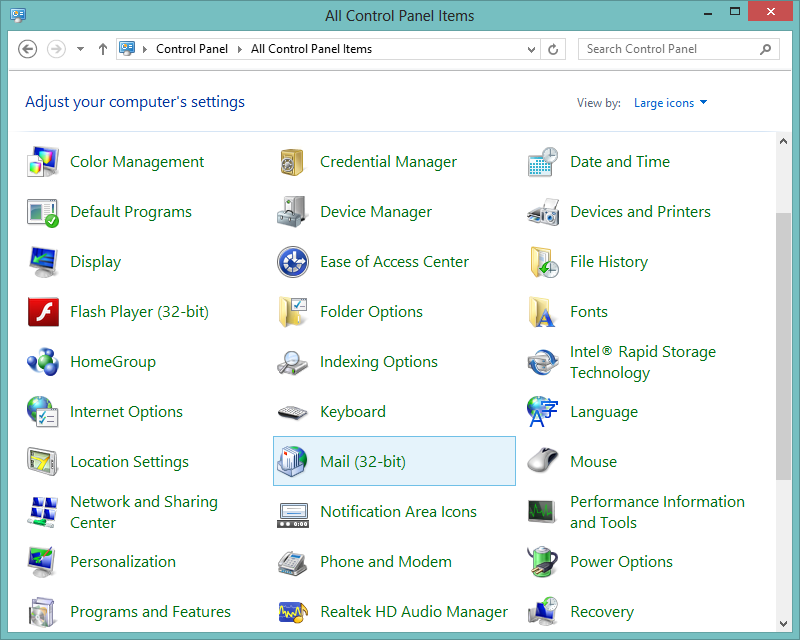
Open Control Panel and then click on Mail (32-bit):
Step Two
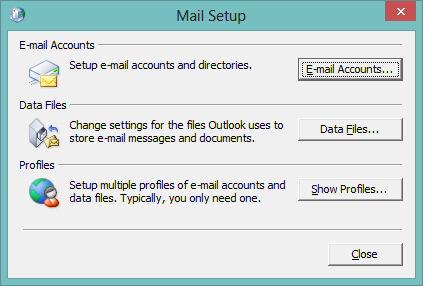
In Mail Setup select the E-mail Accounts button.
Step Three
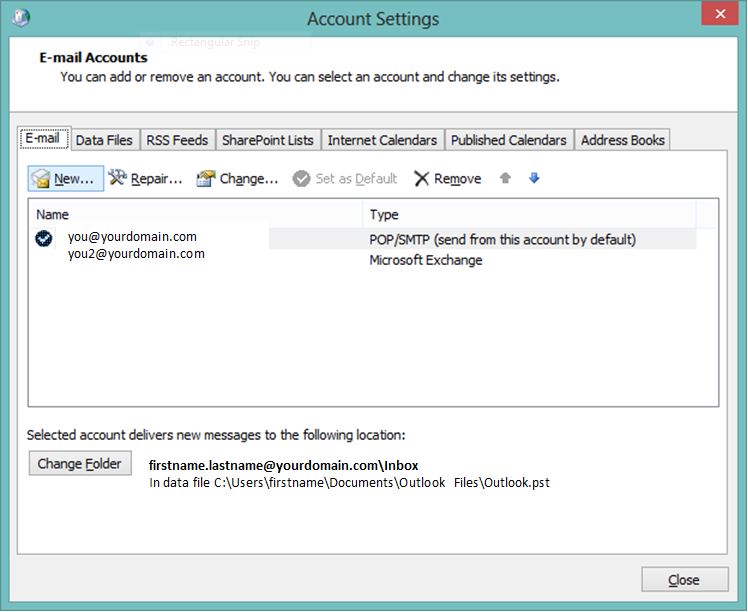
Under Account Settings Select ‘New’ from the top left of the window.
Step Four
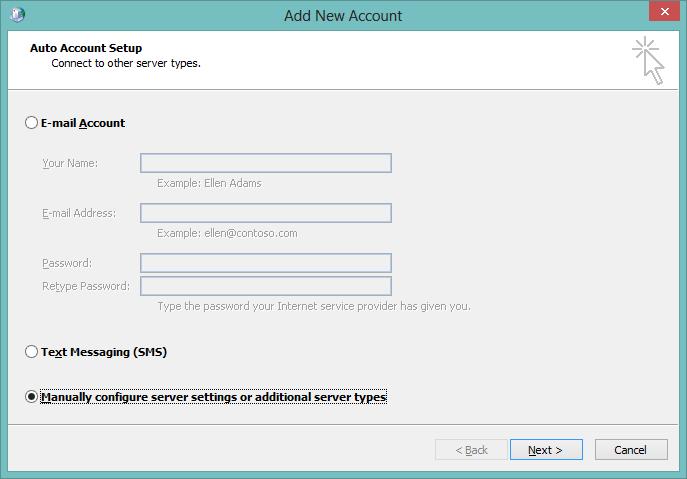
On the Add New Account window select ‘Manually configure server settings or additional server types’ and click the Next button.
Step Five
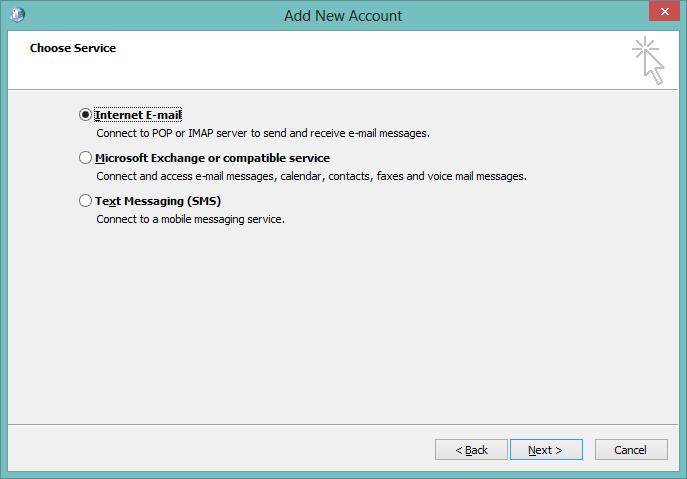
In the Add New Account window ensure the Internet E-mail radio button is selected and click the Next button.
Step Six
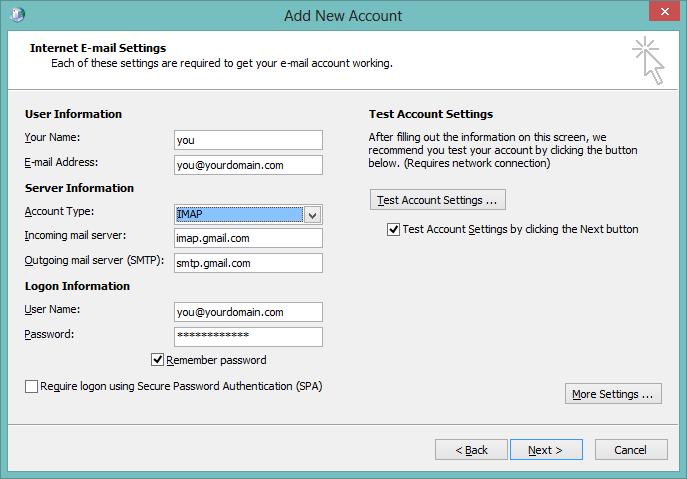
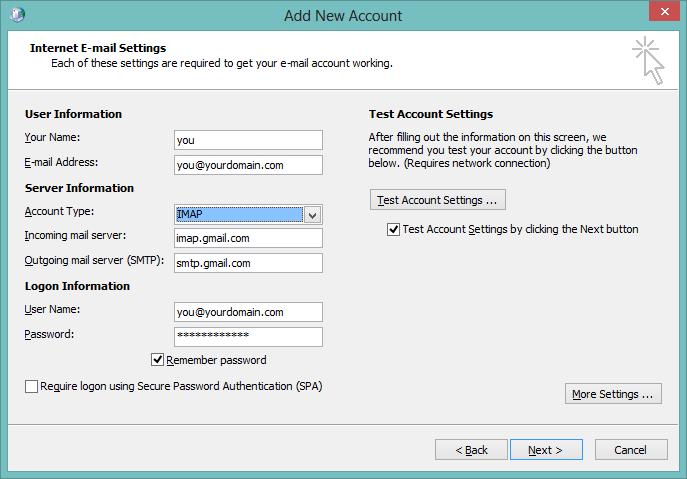
In the Add New Account window enter your username, password and mail server information for the new e-mail account as shown below. Ensure that you replace Your Name with your own name, as well as replacing “you@yourdomain.com” with your specific email address. Verify the information is correct and click the ‘More Settings’ button.
Step Seven
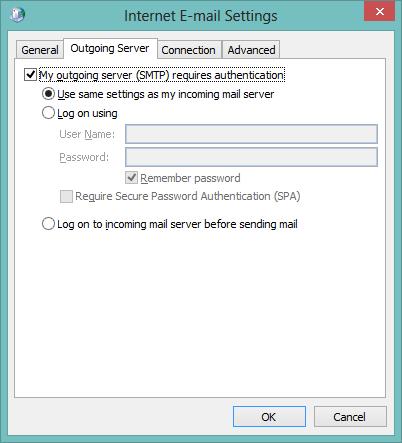
On the Internet E-mail Settings window select the ‘Outgoing Server’ tab and ensure the radio button is checked in front of ‘My outgoing server (SMTP) requires authentication’.
Step Eight
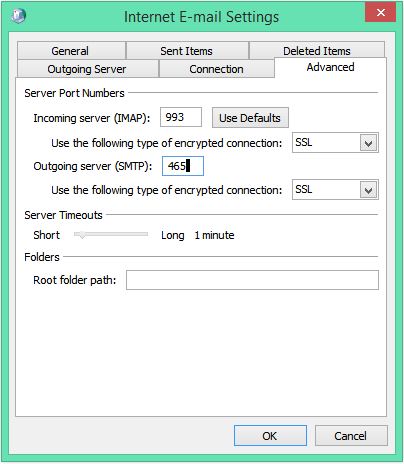
Select the ‘Advanced’ tab and enter the Incoming and Outgoing server port values as shown in the figure below. Use the drop down boxes to select ‘SSL’ for the Incoming and Outgoing servers.
Step Nine
On the Add New Account window select the Next button.
Step Ten
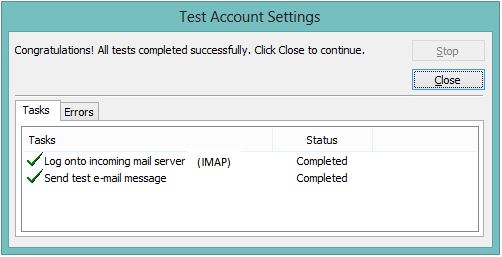
Assuming all information was entered correctly, Outlook will automatically test the account settings and you will see Green checks (as shown in the figure below) confirming successful addition of the new account. Click the ‘Close’ button.
Step Eleven
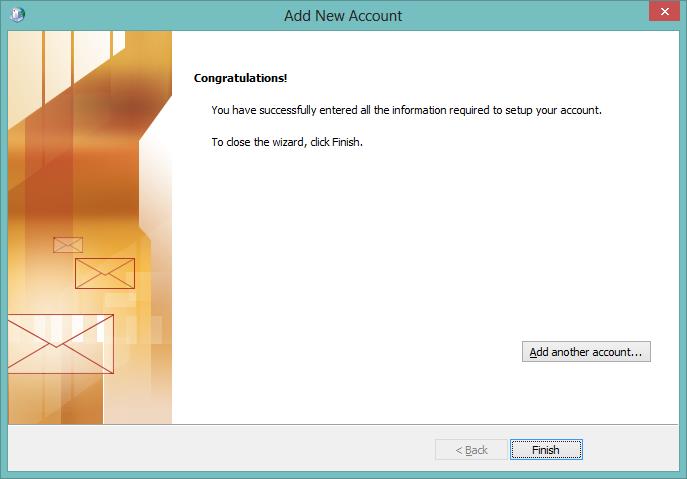
The Congratulations message will appear in the Add New Account window. Click the ‘Finish’ button.
